


Engine Installation: What Actually Protects Your New Engine

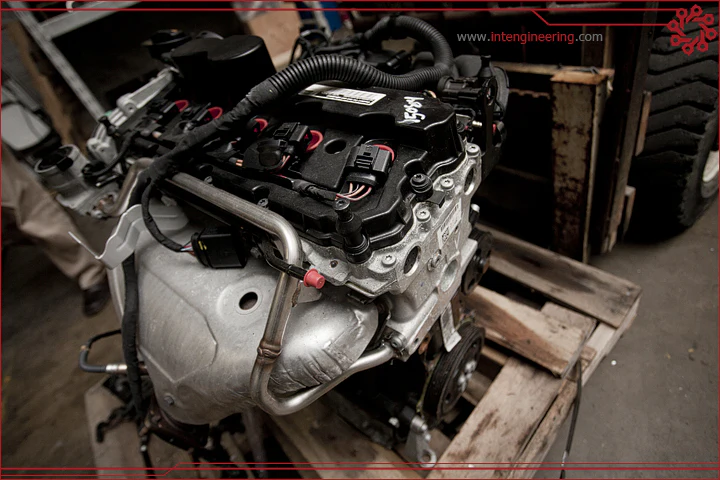
Buying the right engine is half the job. The other half is the engine installation itself, and that’s the part where a good purchase can turn into a comeback if it’s rushed or done out of order. We sell tested, warrantied engines every day, and the install questions we field are almost always the same ones — what to swap over, what to replace no matter what, and what actually voids a warranty. Here’s the real version of that conversation, the one we’d have with you in the shop, not the marketing version.
What “Engine Installation” Actually Involves
People sometimes picture an engine swap as unbolting the old one and bolting in the new one. In practice, a proper engine installation touches a lot more of the vehicle than that — mounts, cooling system, fuel lines, wiring harness connections, sensors, and in many cases the transmission has to come apart from the engine and get reattached. The mechanical part of dropping the engine in is often less time-consuming than everything around it: draining and refilling fluids correctly, transferring accessories, and running the break-in procedure once it’s running.
This is why labor often costs as much as or more than the engine itself on a typical job. It’s not a quick bolt-in task, even when the replacement engine is a perfect match.
What Gets Transferred vs. What Gets Replaced
One of the biggest mistakes in a DIY or rushed engine installation is reusing parts that should be replaced as a matter of course. Here’s the general rule of thumb:
| Component | Reuse or Replace? |
|---|---|
| Timing belt/chain (if not already replaced on the used engine) | Replace — cheap insurance against a future failure |
| Water pump | Replace, especially if belt-driven and you’re already in there |
| Head gasket and all gaskets disturbed during install | Replace — never reuse a gasket once it’s been compressed |
| Oil and filter | Replace with fresh fluid before first start, no exceptions |
| Engine mounts | Inspect; replace if cracked, sagging, or old |
| Sensors (O2, crank, cam position) | Usually transfer from the old engine unless the new one comes equipped |
| Accessories (alternator, A/C compressor, power steering pump) | Transfer if in good condition, unless purchasing a complete engine |
This list isn’t exhaustive for every engine and vehicle combination, but it covers the items that cause the most comeback repairs when they’re skipped to save time or money during engine installation.
The Break-In Procedure Most People Skip
A freshly installed engine — whether it’s a tested used unit, a remanufactured long block, or a rebuild — needs a proper break-in period before it’s driven hard. This usually means varying RPM during the first hundred or so miles rather than holding a steady speed, avoiding hard acceleration, and changing the oil again after a short interval to clear out any break-in debris. Skipping this step is one of the most common reasons a warranty claim gets denied, because it can cause premature wear that looks like a defect but is actually an installation issue.
Specifications to Get Right Before You Start
Every engine installation has a few non-negotiable specs that need to match the vehicle and the specific engine, not just “close enough”:
- Torque specifications for head bolts, main caps, and accessory mounting — these vary by engine and matter more than most DIYers expect
- Correct engine code match — confirm the replacement engine code is compatible with your vehicle’s wiring harness and transmission, not just “fits the same model”
- Coolant and oil capacity and spec — using the wrong viscosity or coolant type can cause issues that have nothing to do with the engine’s condition
- Sensor wiring pinouts, particularly if you’re swapping between model years where wiring connectors changed
- ECU/computer compatibility — some swaps require reflashing or matching the ECU to the new engine’s specifications
If any of these don’t match, the engine can run, but run poorly, throw codes, or fail prematurely — and none of that is the engine’s fault.
DIY vs. Professional Engine Installation
Plenty of experienced home mechanics handle their own engine installation successfully, especially on simpler, naturally aspirated engines with good documentation available. Where it gets riskier is on later-model vehicles with more complex wiring, direct injection systems, or engines that require special tools for timing alignment. A shop that’s done dozens of installs on your specific engine family will move faster and catch problems a first-timer might miss — like a mount that looks fine but is actually cracked, or a sensor that needs to be replaced rather than reused.
If you’re going the DIY route, budget more time than you think you’ll need, have a torque spec sheet for your specific engine on hand, and don’t skip the break-in procedure just because the car runs fine on the first start.
How Long Does Engine Installation Take?
For a straightforward swap on an accessible engine bay, a shop typically completes the job in one to three days, factoring in fluid changes, accessory transfer, and a post-install road test. More complex installs — those involving transmission separation, extensive wiring work, or tight engine bays — can run longer. If a shop quotes a same-day turnaround on a full engine installation, ask exactly what’s included; a rushed job is where corners like reused gaskets or skipped torque checks tend to happen.
What Drives Engine Installation Cost
Labor rates vary by region and shop, but a few factors consistently push engine installation cost up or down regardless of where you are:
| Factor | Effect on Cost |
|---|---|
| Transverse vs. longitudinal engine layout | Transverse (front-wheel drive) often requires more disassembly around the engine bay |
| Whether the transmission needs to be separated | Adds significant labor time on most layouts |
| Direct injection or turbocharged systems | More components to disconnect, transfer, and reseal correctly |
| Age and corrosion of fasteners | Seized bolts and corroded exhaust studs add unplanned time |
| Complete engine vs. long block only | A complete engine with accessories already attached can reduce labor; a long block requires transferring everything over |
This is part of why getting a written, itemized quote matters before any engine installation starts — “labor” can mean very different scopes of work depending on the vehicle and what’s included.
Tools You Actually Need for a DIY Install
If you’re tackling engine installation yourself, the tool list goes well beyond a basic socket set. At minimum, plan on having an engine hoist and stand, a torque wrench rated for the range your engine’s fasteners require, a complete socket and wrench set covering both metric and standard sizes depending on the vehicle, a fluid evacuator or drain pans for old fluids, and a factory or aftermarket service manual specific to your engine code. Skipping the torque wrench is the most common shortcut that causes problems later — torquing by feel instead of to spec is how head gaskets fail prematurely on otherwise solid engines.
Beyond tools, give yourself realistic time. A first-time DIY engine installation on a vehicle you haven’t worked on before routinely takes longer than a shop quote, simply because you’re learning the specific quirks of that engine bay as you go.
Used Engine vs. Remanufactured Engine: Does Installation Differ?
The installation process itself is largely the same whether you’re putting in a tested used engine or a remanufactured engine — same torque specs, same break-in procedure, same attention to gaskets and fluids. The main practical difference is that a used engine may come with more miles on ancillary components like the water pump or timing components, so it’s worth a closer inspection of those parts during install even if they’re not technically required to be replaced. A remanufactured engine typically arrives with fresh wear components already in place, slightly reducing what needs replacing during the swap itself.
Regional Labor Cost Differences
Shop labor rates vary considerably by region — a metro-area dealership or specialty shop often charges noticeably more per hour than an independent shop in a smaller market, sometimes by a wide enough margin to justify driving a bit further for a quote. This doesn’t mean the cheaper shop is automatically the better deal; experience with your specific engine matters more than the hourly rate alone, especially on installs where mistakes are expensive to fix afterward. Getting two or three quotes before committing is reasonable and standard practice for a job this size.
Special Considerations for Performance and Turbo Builds
If your engine installation involves a turbocharged or performance-oriented engine, a few additional steps matter: boost and oil line routing has to clear moving parts and heat sources, intercooler piping needs to seal properly to avoid boost leaks, and ECU tuning may be required to match the new engine’s specific characteristics rather than running on a generic tune. These builds reward extra attention during install since a small oversight — a loose clamp on a boost line, for example — can cause a drivability issue that looks like an engine problem but is actually a simple installation detail.
Common Mistakes That Cause Comebacks
- Reusing old coolant or mixing coolant types, which can cause corrosion or cooling system failure unrelated to the engine itself
- Not priming the oil system before first start, leading to a few seconds of dry running on startup that can damage bearings
- Incorrect torque sequence on head bolts, which can cause head gasket failure even on a perfectly good engine
- Skipping a compression and leak-down check after install to confirm everything’s sealed properly before putting real miles on it
- Ignoring check engine lights after install instead of diagnosing them immediately — a code right after a swap is almost always installation-related, not a sign the engine itself is bad
How Installation Affects Your Warranty
This is worth repeating because it trips up so many buyers: a warranty on the engine itself usually doesn’t cover damage caused by how it was installed. Skipped break-in, wrong torque specs, contaminated fluids, or reused parts that should’ve been replaced can all void coverage — even when the engine that left our warehouse was in perfect condition. If you want your engine warranty to actually mean something, the installation has to be done right, documented, and ideally by a shop that keeps records of torque specs and fluids used.
What to Ask a Shop Before They Start
- Have they installed this specific engine family before?
- What’s included in the quote — gaskets, fluids, sensors, or are those extra?
- Will they perform a compression or leak-down check after install?
- What’s their warranty on the labor itself, separate from the engine’s warranty?
- Will they document the install — torque specs followed, parts replaced — in case you need it for a warranty claim later?
Frequently Asked Questions
Can I install a used engine myself if I’m mechanically inclined?
Yes, many people do — just make sure you have the correct torque specs, follow the break-in procedure, and replace gaskets and fluids rather than reusing them to keep things running reliably.
Does engine installation cost more than the engine itself?
It can, especially on labor-intensive vehicles. Labor often runs comparable to or higher than a tested used engine’s price, which is part of why choosing the right engine upfront matters so much.
What happens if the engine runs rough right after installation?
Rough running immediately after a swap is almost always related to a sensor connection, vacuum leak, or wiring issue from the install — not the engine itself. Have it diagnosed before assuming the engine is at fault.
Should I replace the engine mounts during installation?
Inspect them and replace if they show cracking or sagging. It’s a small cost compared to redoing the labor later if a worn mount causes vibration or alignment issues.
How soon can I drive normally after engine installation?
Most break-in procedures run for the first several hundred miles, after which normal driving is fine. Follow the specific guidance for your engine rather than a generic number.
Bottom Line
A good engine installation protects the investment you just made in the engine itself — and a rushed one can undo all of that, warranty included. Whether you’re doing it yourself or hiring it out, follow the torque specs, replace what should be replaced, and don’t skip the break-in period. Browse our engine installation cost breakdown, check out installation tips for after your engine arrives, or see our current tested engine inventory before you start a swap. For torque spec standards and general service procedures, the National Institute for Automotive Service Excellence (ASE) is a solid independent reference for what proper installation practice looks like.
Posts Widget




Best Auto Motors
USA HERALD MAGAZINE INC
Buy the best quality engines from our website online and get a fast delivery within 6 days.
Copyright 2022.KlbTheme . All rights reserved
